Tuesday, August 27, 2013

Melt Cosmetics: Review


INSTAGRAM: thebeautyyouwear
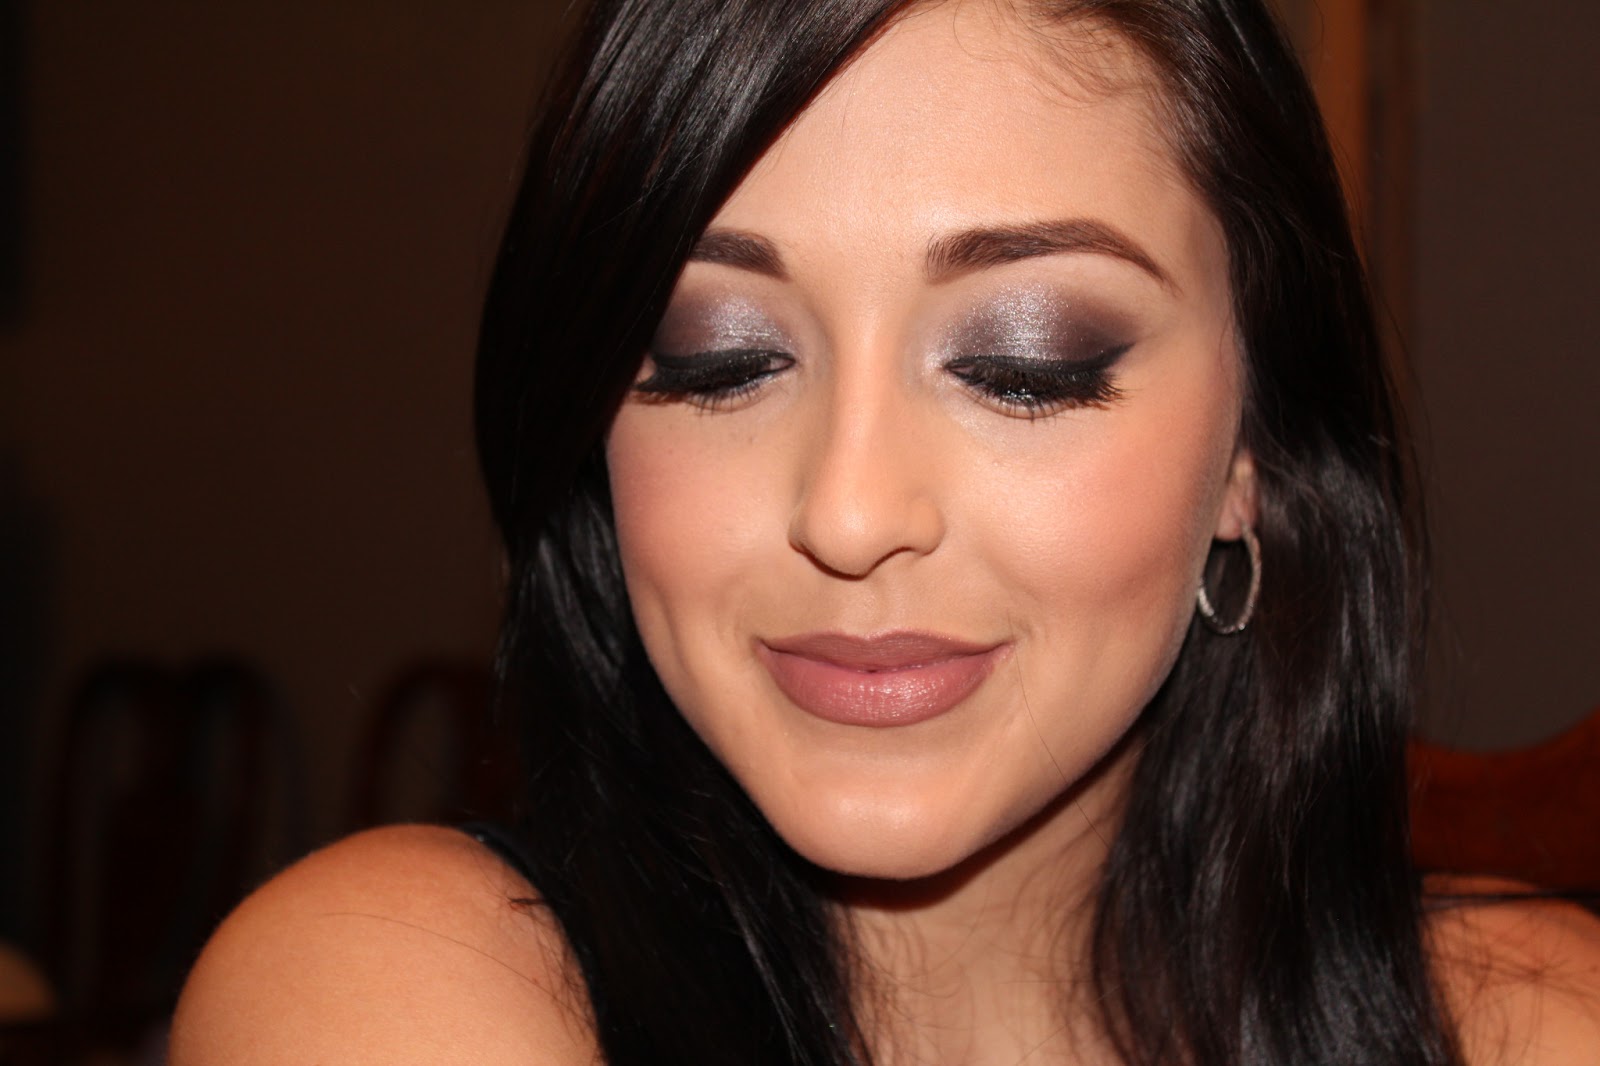
Hey Ladies!
LIPSTICK TIME!!!!
So I purchased two lipsticks from MELT Cosmetics a couple months ago and I'm just coming around to actually trying them, so I thought i'd write a review on them. The Melt lipstick line just came out about three months ago and I believe it was created and launched by two make-up artists from the entertainment industry. All their lipsticks are cruelty free so it's nice to know that no animals were harmed during the making of the products.

Okay, so there's five colors available: Belladona, Starlight, Darling, Stupid Love, and Summer! I bought Starlight, which is the deep purple shown in the picture above and Stupid Love (i'll do another post on that beautiful pink later because this purple is so pigmented that it stained my lips and the pink wouldn't show true to color due to the stain.)

Anyway, let me start by saying that these lipsticks ARE pricey. They're $19 each, making them about $5 more expensive than MAC lipsticks, BUT all of the Melt Cosmetics colors are so pretty and bold that I couldn't contain myself and I dropped $45 on two lipsticks including shipping costs. If it wasn't for the $19 price tag, I would've probably purchase all five Melt colors! I must say that I normally wouldn't wear this deep purple but I think it'll be a good color to rock on a night out to the club with an all black outfit!

I love the fact that they're completely matte and they're not hard to apply at all. I don't know about you ladies but for me, the MAC matte lipsticks are hard to put on and they dry my lips (yes, I'm still madly in love with all of the MAC though) I just added a bit of chapstick before I applied the color and ta-daaahh!!


                                                    XOXO,

Friday, August 23, 2013

Smoked -- Urban Decay//NYX//MAC products


Instagram: thebeautyyouwear

EYES
NYX eyeshadow base in nude all over lid
MAC charcoal eyeshadow on the crease to help with the blending (I used the the ELF small contour brush because it picks up a lot of product)
SideCar eyeshadow from the Urban Decay Naked Palette all over the lid using my MAC 239 brush(I applied this under the black shadow to add some sparkle undertone)

For the dark part (I call this the difficult part) here's what I did...

First I applied the NYX nude matte eyeshadow in Stripped using my MAC 219 brush (I used that brush because the NYX shadow is VERY powdery and if you use a fluffy brush the excess product will get all over your under-eye, although you could just clean it off, why not try to avoid it! Just saying)
After the eyeshadow was on, it was still not dark enough for me, so I went over the black NYX shadow with the Laura Mercier Caviar Eye Liner in Black. I applied this with my Urban Decay shadow brush. Now, yes, the Laura Mercier liner is thick and meant for eyeliner, but I just dipped the brush into the eyeshadow base and then onto the liner powder and it worked out perfect!
Anyway, after I was done applying both black shades, I used the Sephora Crease brush (which by the way, it's AMAZING although I think i've said that before) to blend the dark edges into the brown shadow I applied at the beginning.  The blending process can take longer than the actual shadow application but it's what puts the look together!! So take your sweet time :)


FACE
I have the Bare Mineral Original Foundation in medium beige
MAC Fleur Power Powder Blush with a tiny bit of Benefits "10" blush (discountinued)
NYX LipLiner in Nude Beige on my lips

                                                    XOXO,

Tuesday, April 30, 2013

TREND ALERT: E.L.F


TREND ALERT!

Ladies!!! ahhhhhh it's bright colors season!!!

Changing up your eyeliner color an easy way to make your eyes stand out and change it up a bit from the brown or black that we normally turn to. Try this, I can guarantee you'll get many compliments throughout your day :)

I have purple eyeliner on my bottom lash line and blue on my waterline. You could also use eyeshadow as eyeliner! Simply dab the liner brush on a wet towel and use to apply your favorite shadow as liner! This will help you save money if you don't want to splurge on colorful liners that you'll probably wear a handful of times!

BTW, E.L.F has really good, super cheap cream eyeliners from their Studio Line! $3 each AND they have a really nice teal color and a purple one as well. Target carries them or here's the direct link to their site!

XOXO

Thursday, April 25, 2013

Quick and Easy Fluffy Curls: Hot Tools Curling Wand


 Hey ladies!

Here's a quick and easy way to take your hair from the regular ol' straight look to fabulous curls!

For this look, I used the Hot Tools Curling Iron in 1-1/4"
To start, I clip up half of my hair, I like clipping it up because it gives you a better looking curl than when you just grab random pieces. Grab a chunk of hair from either side, remember the thinner the chunk = the more defined the curl will be. I usually just grab thicker chucks on the bottom because they won't curl as much AND your hair will appear to be longer than it is; the bottom layer won't be as curly as the top layers... Don't worry, this won't be noticeable because you will blend them out at the end.
Always curl your hair outwards from each side, it just looks better (:
Once you're done with that layer, leave the bottom part down and divide the second layer and clip the rest up.
Grab another chunk, only this time get a smaller chunk because now you want your curls to be tighter and more defined. Curl outwards from each side. Repeat this process until you get to the top layer, remember to get smaller chunks as you reach the top of your head. It's OK if they look like Shirley Temple curls, LOL, once you're completely done curling just run your fingers through your entire hair to blend out the curls. Don't use a brush, this will only make your hair puffy!
Make sure you leave the wand on while you blend the curls so that you could do any final fixing on those curls girl!

and viola! you're done. You could do some teasing on your roots to add volume. Nothing to be afraid of, the bigger the hair the better<3


          Hot Tools Gold Tapered Curling Iron

                                                 
 $42.99 at Ulta


 P.S.
 DON'T hold the hair for 20 seconds or else IT WILL FALL LOL

Sunday, April 7, 2013

Lets talk about brows: Gel, Shadow or Pencil!

Lets talk about them eyebrows!! sheesh, truth is... all you need before you leave the house is some mascara, eyebrows on point and you're set to go... amen to that!

Yes, it takes time to learn what works best for your eyebrows and what shape looks better on you, but practice at night before you wash your face (that's what I still do LOL) and slowly but surely you'll perfect them brows girl!

Well, let me start by saying that doing my eyebrows are STILL the hardest thing for me to do. I don't do them everyday because we all know "ain't nobody got time for that" but having my eyebrows shaded in are a MUST when I go out. I tend to thicken them up when I go out just because I usually slap on some fake lashes but if I don't wear them then I just keep my natural shape because your lashes and eyebrows must be balanced! It looks tacky otherwise!

Moving on, lets get to the point of the blog! I wanted to give an idea of the difference between using eyeshadow, gel and pencil to shade in the brows. I took a picture with each of the options in hopes that it would help some of you ladies figure out which one would work best for you. The pictures below have no filter so you have an real view of what each one looks like on.

EYEBROW TIPS from yours truly:

ladies,

if you're brunetteu use 1-2 shades lighter than your hair color
if you're blonde use 1-2 shades darker
if you're redhead go for a shade darker
IT IS a trial and error game, don't be afraid to try different colors/shades!!! it took me like 19652365 times LOL 

 
I used the MAC 212 brush and Maybelline EYESTUDIO gel eyeliner in brown to shade my eyebrows. Yes, it's eyeliner but it works the same as eyebrow gel and it's soo affordable! However, I must say the gel doesn't last as long as the shadow or pencil, at least for me, so it helps if you retouch if you plan on wearing it long periods of time. 


This shade is the MAC eyeshadow in Espresso and I used my MAC 212 brush as well. I absolutely love this shadow, I like it better than the MAC Charcoal shadow, Espresso is darker and fits my color a tad better. I would say the Charcoal is a shade lighter than this one.

and finally, on to my FAVORITE brow pencil EVERRRRR!! In this picture I used the Anastasia BrowWiz pencil in Caramel! OMG I have nothing else to say than THIS PENCIL IS A MUST TRY. I discovered this baby over a year ago and I just keep going back to it! I love that it's not harsh so it's super easy to apply. It's pricey but definitely worth it AND it lasts a long time. 


 Before I bring this post to an end let me tell you how I find it easier to fill in my eyebrows. First, I outline the shape that I want, both top and bottom to make sure I get the arch right, then I fill the end of the brow first (the side closed to my ear) only because it's easier for me and then I fill in the ticker part (closer to my nose)

Remember, there's no right or wrong way, it's all about finding what works best for you!

XOXO


Friday, March 22, 2013

Tarte Primer: Smooth Poreless Face

Hey hey hey ladies!!
Get ready because this one is a long one BUT worth it!

Let's talk about primers today eh?! So, I have a confession! I didn't start using primers until about a year and a half!! I've always loved make-up HOWEVER can somebody explain to me why the heck I didn't even know what primer was up until last year?! ohh lawwwd, it's bad! LOL anywho, since discovering such a thing I had tried more than a couple to try to figure out which one works best for me.

It's EXTREMELY important to know what type of skin you have in order to find the primer that gives you the best results. So far, I've tried the E.L.F Mineral Infused face Primer, which by the way, for the price of $6 it does a mighty fine job. I've also tried the MUF HD Microperfecting Primer which is extremely expensive and I didn't like it at all, and I have finally found my ALL TIME FAV... *drumroll please* the Tarte Clean Slate Poreless face primer!!

I bought this $9 Tarte Primer sample at Ulta a couple months ago and yes ladies, this... is... it.. it's thee one.. for me! LOL I've been using on and off to see if it really makes a difference and it totally does. Here's why I love this!

First of all, let's go over two primers that come in this set really quick before I get into my FAV one, Tarte Clean Slate Flawless and Clean Slate Creaseless 12-hr eye primer, I don't have much to say about either of these. In my opinion they the consistancy is not good. They feel more like a lotion rather than a primer. I feel like as soon as I applied it onto my face it would sink into my skin like a moisturizer. Both the face and the eye primer felt that way to me! womp, womp, womp... it's a good thing I didn't buy the actual size or I would've had a fit!!

Let's move on to my fav one of them all, that pretty purple container (: It's the Clean Slate Poreless face primer and let me tell you, it's AH-MAZE-ING! I absolutely love it! &&Let me tell you whyyyyyy!!

The texture to this is sooo silky! It leaves my skin smooth and it makes my foundation and/or powder glide on. If you have open pores this will also help cover and decrease the look of them! YES, you do have to get used to the texture because it feels so weird at first but it works! When I apply the primer it also feels like it stays on top of my skin instead of being absorbed! Also, I feel it does help my make-up last longer, at least troughout the nine hours i'm at work!

I must say I don't wear it every since day only because it's pricey. I did purchase the actual size primer and dropped $30 on it at Sephora but it's worth it!!
Again, the sample set has all 3 for $9 at Ulta or Sephora <3 Give it a try! Let me know which one you like best ladies!

Tuesday, February 26, 2013

Room Decor: Jewelry and Lipstick Organizer

HEY LADIES!

AHHHHH I'm super excited about today! OK, so lately I've been re-organizing and moving around everything in my room. I looked online for all kinds of cute ideas to add to the room to make it more modern and stylish! My priorities are my jewelery and make-up so here's what I found... I haven't  found everything I need and I still have to make everything come together and look cute on my vanity but I'm uberrrr excited about these pieces!!

I found this 3-tier bangle organizer at The Container Store for $19.99!!! I think they also have it in acrylic but I love how it looks in black suede because it makes all the jewelery stand out and look pretty. The picture doesn't do it much justice but it definitely looks so pretty! I'm thinking about adding all my watches (instead of keeping them in their boxes) and organizing it by color as well.
As you could see I'm a stud lover! So I thought this case was perfect to keep my earrings in. These cases are by Ellen Tracey and I found them at TJ MAX for $9.99 each! I picked up two in the black and white because I want to match all my decor and considering that the bangle holder is black suede these were just perfect!
FINALLY, yes, ladies... I have found the PERFECT lipstick organizer! I picked this acrylic 24-lipstick organizer at The Container Store for $7.99! No, they don't make it in black suede (probably because it wouldn't stay clean for long) but I still love the look! I love that I will no longer have my lipsticks laying around or falling from my vanity! =D super excited!! I do wish I was able to place the lipsticks upside down, to be able to read the colors, but because MAC lipstick tops are round it's impossible, however, the squared CoverGirl Lipsticks (on the top right hand side) fit perfect upside down!


There it is! This is just the beginning of my room project but I will keep you ladies updated with any other cute finds I come across! Have a good night <3<3<3

Tuesday, February 19, 2013

MACs Archie's Girls Collection: Lipsticks

 Betty's lipstick in Girl Next Door
Veronica's lipstick in Daddy's Little Girl
Veronica's lipstick in Boyfriend Stealer
Betty's lipstick in Betty Bright

So, let me start by mentioning that this is the first time I have actually waited for any MAC collection to come out! I was extremely excited for this collection because there were so many cute things!! wellllll, yeah, it was probably just the packaging that got me. I received the products a day before the collection was out (the collection was released online a week before it came out in stores) and let me just say that I was not impressed by it.... womp, womp, womp... Don't get me wrong. I LOVE MAC but I just wasn't impressed at all. 
Let's start with the face products that I bought. On all the pictures above I am wearing Veronica's Powder Blush in Prom Princess and on top of that I put a tiny highlight of the Pearlmatte Face Powder in Flatter Me, both from the Archie's collection. Those two I absolutely loved! The blush is definitely super pigmented so I dabbed it on with a fluffy brush to avoid looking like a clown and the Pearlmatte powder is really nice and easy to apply. It's similar to the MACs Soft and Gentle Mineralize Skin Finish but with more of peachy undertones.

Next, the lipsticks. Let me say that Veronica's Daddy's Little Girl is definitely my FAVORITE one! (: The color is perfect for Spring/Summer and the purple undertone it has is just fabulous!

My second fav is Betty's lipstick in Betty Bright... however, it is extremely similar to the Viva Glam Nicki lipstick. Yes, Betty Bright has more of a coral but still, they're really really similar!

Girl Next Door is also a really nice color but I don't love the texture to it. It is a Lustre finish so maybe that's why! I don't know why the Lustre lipsticks are just hard for me to even out sometimes, but maybe it's just me! This color is really nice and low-key, so it's more of a wear-to-work color. 

Wow, Veronica's Boyfriend Stealer is the darkest one! It's definitely not a regular color I would pick up but I like this one because its a Creemsheen finish so it's not too dark! This color will look nice on a skin colors. I wouldn't wear this color on a daily basis but I could see myself wearing it on a night out, most likely with my hair tied back in a bun. 

I just checked online and all these products are already sold out but you could check your local MAC to see which ones they still have in stock; I think Nordstroms might still have the PearlMatte Powder and the blush. 

Well, there it is ladies! Goodnight (: 


Tuesday, February 12, 2013

a touch of pink for Valentines -- BH Party Girl Palette


EYES (In application order)

With your finger apply NYX Eyeshadow Base in nude all over the lid

With a small shadow brush use the number 1 shadow shown above from the BH Cosmetics Party Girl Palette. Apply the light brown color on your crease to make it easier for the colors to blend. Doesn't matter if there's any harsh lines after you apply; you'll blend those out later on.

Using a flat shadow brush apply the number 2 shadow on your lid. Make sure you don't apply it above the brown shadow you applied prior. I applied two layers of this shadow to intensify the color a bit more.

With a blending brush, blend out any harsh lines you have from the brown shadow and sofly blend the pink with the brown shadow. Once you blend the colors, re-apply a layer of the pink shadow just on your lid.

Lastly, using a countour shadow brush apply the number 3 shadow on the inner lid. The white shimmer will brighten up your eyes and soften the pink a bit.

I used the MAC Fluid Line in BLACKTRACK and the ELF Studio angled eyeliner brush to do a winged liner. I made my eyeliner thinner this time to make the pink shadow more noticeable.

Glue on some full lashes and you're set to go!

LIPS
I mixed NYX lipliner in ROSE (I applied it as a lipstick) with the Wet 'n Wild Bare It All lipstick


I bought my BH Cosmetics Party Girl Palette from their online site. This palette is selling for $10 right now!! Super afforable and great quality for the price! I paid for the palette myself, so I'm not advertising for them or anything (: I also have a post on this palette so check it out if you want more details on the product review!


Happy Valentine's Day everyone<3<3<3


Tuesday, February 5, 2013

Shimmer in those Eyes -- BH Cosmetics Jenni Rivera Palette


What I used:

EYES
BH Cosmetics Jenni Rivera Palette
NYX Eyeshadow Base in nude
MAC Espresso Eyeshadow 
Sephorea Crease Brush
MAC Fluid Line in BLACKTRACK
NYX Jumbo Pencil in Black Bean
MAC 219 brush
MAC 239 brush
ELF Defining brush
ELF Small Angled brush
LIPS
Wet n Wild in Bare It All
FACE
Loreal BB cream
Bare Minerals Original foundation in Medium Beige
Estee Lauder Blush in Blush All Day


How I applied it:
1. Apply eyeshadow base all over eyes
2.  Using the crease fluffy brush apply the MAC espresso eyeshadow on your crease, it could be above your crease or below as well, just depending on what effect you want to have once you apply the other colors.
3. Next, apply the #1 shadow (shown above) from the Jenni Palette all over the lid using my MAC 239 brush.
4. With the crease brush, buff out the espresso color you applied first with the #1 eyeshadow to blend any rough edges. Blend, blend, blend!
5. Once you get both colors to blend, use a defining brush to apply the #2 shadow from the palette to the center of your lid. Make sure to apply it below the brown shadow that you applied on your crease.
6. Using the MAC 219 apply #1 eyeshadow on the inner side of each lid. This will help brighten up your eyes (I didn't use a highlight under my brows for this look.)
7. Apply liquid liner, I used the MAC Fluid line and applied it with my ELF Small Angled Brush
8. I used NYX Jumbo pencil in black bean for my bottom liner and my waterline.

That's it!

 It actually didn't take my long to do it, it probably took about 5 minutes or less for each eye (including the liner which is what takes me longer!)  REMEMBER THE KEY IS TO BLEND THE COLORS. Blend in circular motions from left to right then right to left. If the colors fade while blending it's ok! just re-apply more color and blend it some more until you get the desired color.

I bought this palette from the BH Cosmetics website ---->  HERE. I paid $24 about six months ago but right now it's $18 (the prices change often depending on the sales the website has.) I also did a post on this palette a few months back. Go check out my August 26 post to read my thoughts on it and to see the swatches.

Thanks for reading!
Good night (:  XOXO